
How To Calibrate Your Turntables
 LEARNING THE INSIDES AND OUTS ABOUT YOUR 1200’S
So your wondering how to calibrate your decks for higher performance and torque!? OK, this is how I calibrate my tables and the ones that I service, It takes no fancy tools just a little common sense and a little know-how.
First we will start with my list of precautions:
Whenever the platter is to be off of the table, be sure to unplug it from the wall. If it were plugged in and accidentally turned on the motor will torque with no feedback and it could possibly smell really bad (smoke) believe it or not smoke is not cool, hu hu!
In no way do I claim responsibility for the work that you do to your tables. In other words, if you screw up you cannot blame it on me, just a legal ramification that must be said in order to maintain my identity.

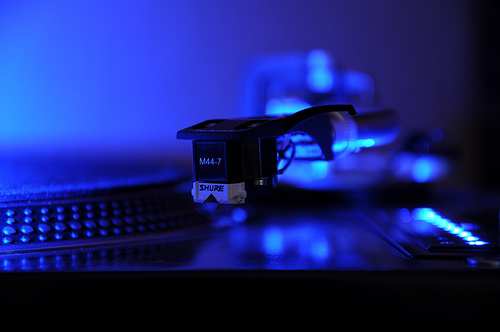
Vinyl
Now for the fun stuff……
These series of adjustments will make your tables match each other as perfect as possible. If you feel that your tables are fine then do not tamper with them. Also, if your pitch lock is modified then I would be leery of doing this. Off of the record I would not recommend defeating the Quartz Lock of any of the 1200 series, you paid too good of money for this luxury so enjoy it.
As stated above this will make your tt’s match each other but will probably also make the scale on the side return to the accuracy it was at the factory. This just happens to be 6% right at 6 and 3.3% at just a little over 3. Also, by no means should this scale be considered accurate, it is just a rough estimate, the true pitch is what the strobe dots read on the side of the platter.
Making sure you only have one Zero……
This is a very important step in determining what needs to be done to your tables, it is also very easy. Some tables (especially older ones) have, what is called, two zero points. The 1200 has provisions for utilizing two zero points one of which is the Quartz Lock which is guaranteed to be exactly 33.333333 RPM. The other point is set by a potentiometer on the same circuit board as the master slider. The adjustable point is factory set so that it corresponds with the Quartz Lock. If this adjustment were to be bumped forward for some un-foreseen reason your table would slow down from 33.33333 RPM then re-zero then speed up from 33.33333 RPM as the pitch slider is pulled forward. The exact opposite would happen if it is bumped the other way. The only tables that I have seen this problem in are ones that happen to contain a LOT of what is commonly defined as Bar Gunk.
Checking for two zero points……..
If you haven’t gathered you only want one zero point, unless you know of some trick that I don’t. This can be checked by placing your slider so that the green LED lights up, your 0% dots should be holding still, if not then you are out of the league of this post and should be consulted separately. Now move your slider forward so that the green LED just shuts off. If the table slowed down, even just a little, then you have two zero points. If not then continue. Now push your slider back a little so that the green LED goes off once again. If your platter speeded up then you have…yes…two zero points. If all checked out well then be happy, very happy, and continue to Matching Your Tables. If not then continue to the next section.
Zeroing your tables……..
This will go in a series of steps:
- Be sure you are completely sober. (this is not a joke)
- Unplug the tt from the wall and the mixer/amp/whatever.
- Lock the tone-arm in place and secure any fly-arounds.
- Place the dust cover on the table and put a pillow on the kitchen table.
- Place the table upside down on the pillow. Or use something to prop the table up. Remember to be careful with the tone arm.
- See all of those screws on the bottom? Take ’em all out except the ones around the little round piece of metal holding in the signal cables.
- I bet you’ve found all of the little washers. Don’t LOOSE them. There also little chrome spacers in the corners and where the long screws go in. SAVE these too.
- Carefully pull off the rubber housing taking care not to damage the power cord while getting excited.
- Do you see the circuit board with the pitch slider on it, there should be a hole in it with a screwdriver slot in it, this is your zero adjust, if you do not see a hole, some don’t have ’em, then you’ll have to remove circuit board, follow directions below.
- Reach around and pull the knob off of the pitch slider on the top.
- Unscrew the screws holding down the board and pull straight up. Now you should have a circuit board in your hands, with; a large slider, a LED, a resistor, and a potentiometer-this is your zero adjust.
- Clean out the potentiometer by blowing on it or spraying TV Tuner and Contact cleaner on it, many times dust causes these problems and can be remedied by a cleaning.
- Place the rubber housing on the table and temporarily flip it over, plug it in and check your zero again, if all is well you are done and can put your baby back together and continue to Matching Your Tables, if not, then continue.
- Unfortunately you have to adjust your potentiometer
 . Now bear with me. If your zero point is too far forward then the potentiometer must be moved clockwise if you are doing it from the bottom and counterclockwise if turning from the top, TOP BEING THE SLIDER SIDE.
 - Turn the potentiometer in small increments each time, checking the position by repeating step 11.
- Within minutes you should find the zero point you are happy with; just don’t get in a hurry, you only want to do this once.
- If you are happy with the zero point, then put the tt back together and have a non-alcoholic drink, because you might have to continue.
 CONGRATS THE FIRST STEP IS THE HARDEST!!!!!
thought I’d tell you last though….
Matching Your Tables
Matching a pair of 1200s is a relatively easy job that proves helpful when working with doubles. This just ensures that when both sliders are at 1, 2, 3, 4, 5, 6, etc. the two tables will be at the same speed. It may sound useless at first and many DJ’s claim they don’t need it but all DJ’s love a matched set of 1200’s and you can have ’em. First set both tables up and set the slider to +6, the strobe dots corresponding to 6% should be holding still, very still, dead still. If both tables are, then you are done and they should OK for the whole range. If not then read on. Technics has what is called a pitch gain adjustment, this basically determines how sensitive your pitch control is. Some DJ’s tweak this so that massive amounts of pitch adjustment are possible, this can be cool for rave and other things that have limited vocals, trance, etc., but I find it rarely used for house/high energy/hip-hop and other styles with vocals. I personally prefer mine stock and this adjustment will make them stock.
Adjusting the pitch gain.
this is also done in a series of steps…..
- Set your tables side by side on a table that is easy to work on.
- Unplug the tables, and remove the platter, this us usually done by placing your fingers in the holes and lifting straight up, but, this rarely works soooooooo… find a friend you trust A LOT and have him/her tap on the spindle very LIGHTLY with the handle of a screwdriver while you pull up, this will free it.
- See the black plastic piece with a warning label on it, read it, now remove the screws and take it off like it says not to do.
- Inside the tt you will see a circuit board with the drive circuit on it, in the near upper right corner you will see a potentiometer with the pitch above or near it, the potentiometer is usually blue and white, this is your pitch gain.
- Now place the platter on the table and look through the holes, you can see the potentiometer can’t you??? Wasn’t Technics nice!?.
- Plug the table in and set the slider for 6, are the 6% dots pitching too slow or too fast? Remember this!!!
- Unplug the table before you stick your metal screw-driver back in it and inch the pitch gain potentiometer forward if the dots were pitching slow or backward if they were pitching fast.
- Repeat steps 6 & 7 until the 6% dots are rock steady for both tables when they are both at 6.
- Check to see if the pitch dots correspond at different speeds relative to each other, they should be very close.
- That was the last step, now you are done, unplug your tables and put them back together.